
It can be discouraging to spend time crafting content for your website, only to have users quickly click away. Since most people scan text on the web, you may have better luck holding their attention if they can skip right to what they’re looking for, by providing them with a table of contents in WordPress.
A table of contents can make it a lot easier for readers to find exactly what they’re interested in, especially with longer content. It can also be helpful for Search Engine Optimization (SEO). Fortunately, whether you have some coding knowledge or you’re a complete beginner, adding a table of contents is a pretty simple process.
In this post, we’ll show you three ways to create a table of contents for a WordPress site, including using plugins and a manual approach.
Three ways to create a WordPress table of contents
Here are the three methods we’ll cover – you can click below to jump straight to a specific technique:
- Use a dedicated plugin
- Create your table of contents using blocks
- Build a table of contents manually
1. Use a dedicated plugin
Using a plugin is a quick and easy way to add a table of contents to your posts or pages. Easy Table of Contents is a free tool that automatically generates a table of contents based on the headings in your text:
Here’s how to use it:
Install the plugin
You can get started from the WordPress admin dashboard by navigating to Plugins → Add New. Search for the plugin, and then click on the Install Now button followed by Activate. Overall, a standard path to installing a WordPress plugin.
Configure the plugin’s general settings
Next, you can tweak the plugin’s settings to your liking. Navigate to Settings > Table of Contents to find all of the available options:
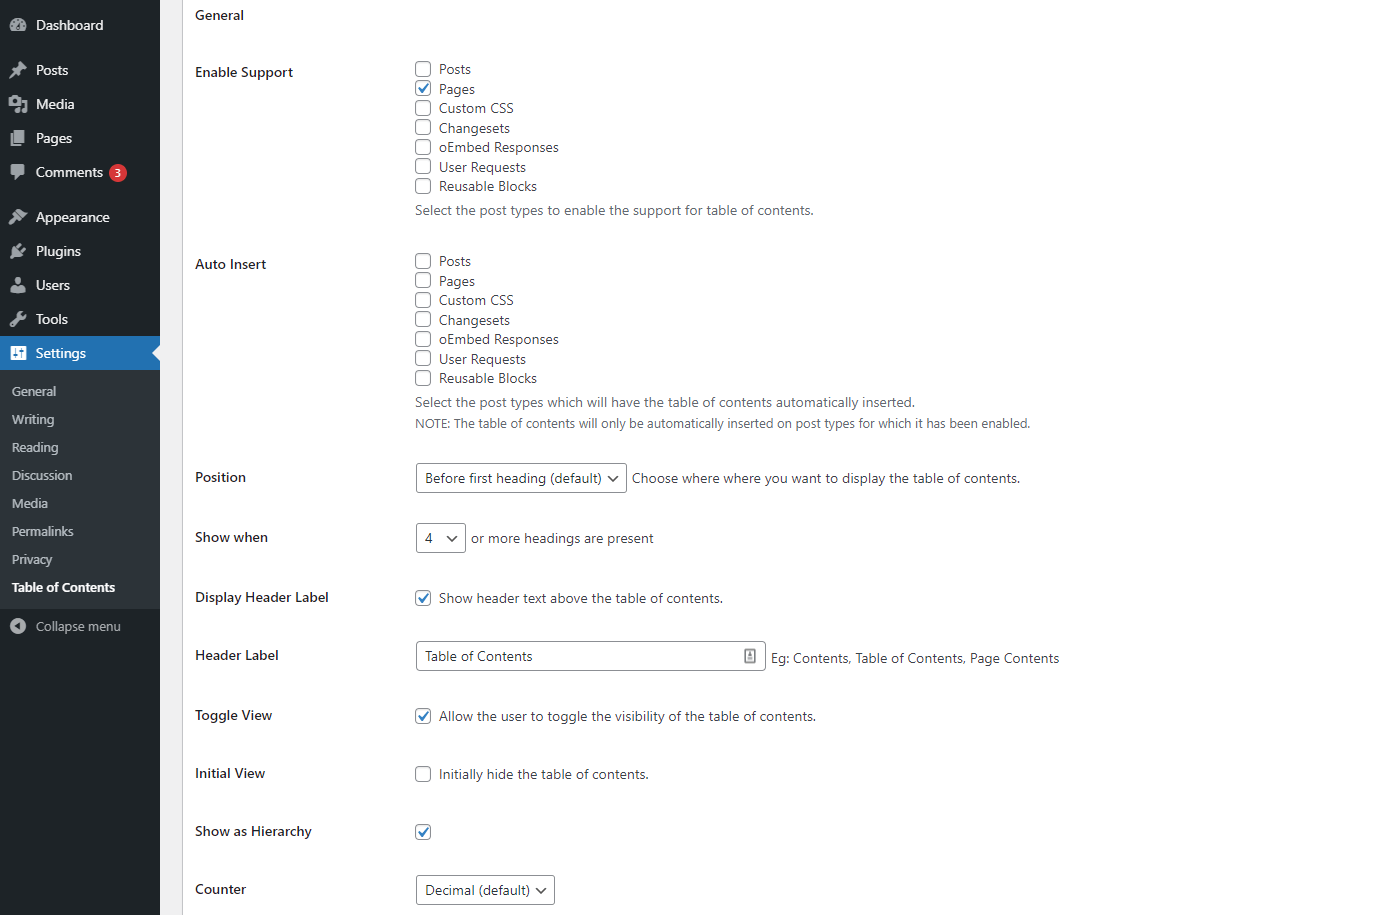
First, you can determine which post types the plugin will support. Pages is selected by default, but you can choose any combination of the available settings.
Next, you can choose which post types will have a table of contents automatically generated and inserted. Note that you’ll need first to enable support for each post type you’d like a table of contents generated for.
Then you can decide where you’d like the table of contents to show up. You can place it before or after the first heading, or at the very top or bottom of the post:

You can also control how many headings need to be present before the table of contents is included. This is handy if you have a combination of long and short content, as you may not want a table of contents for your briefer posts:

After that, you can use the Header Label field to give whatever title you’d like to the table of contents. You can also choose whether to allow users to hide the feature. If you enable this option, readers can click a button to collapse the table:

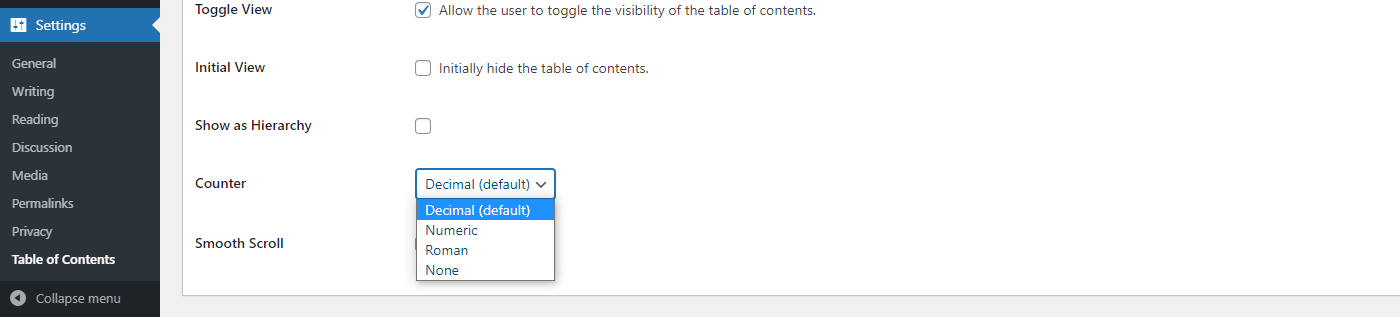
You can also hide the table of contents by default by checking the Initial View box. This means that users will need to click on the button to display the information.
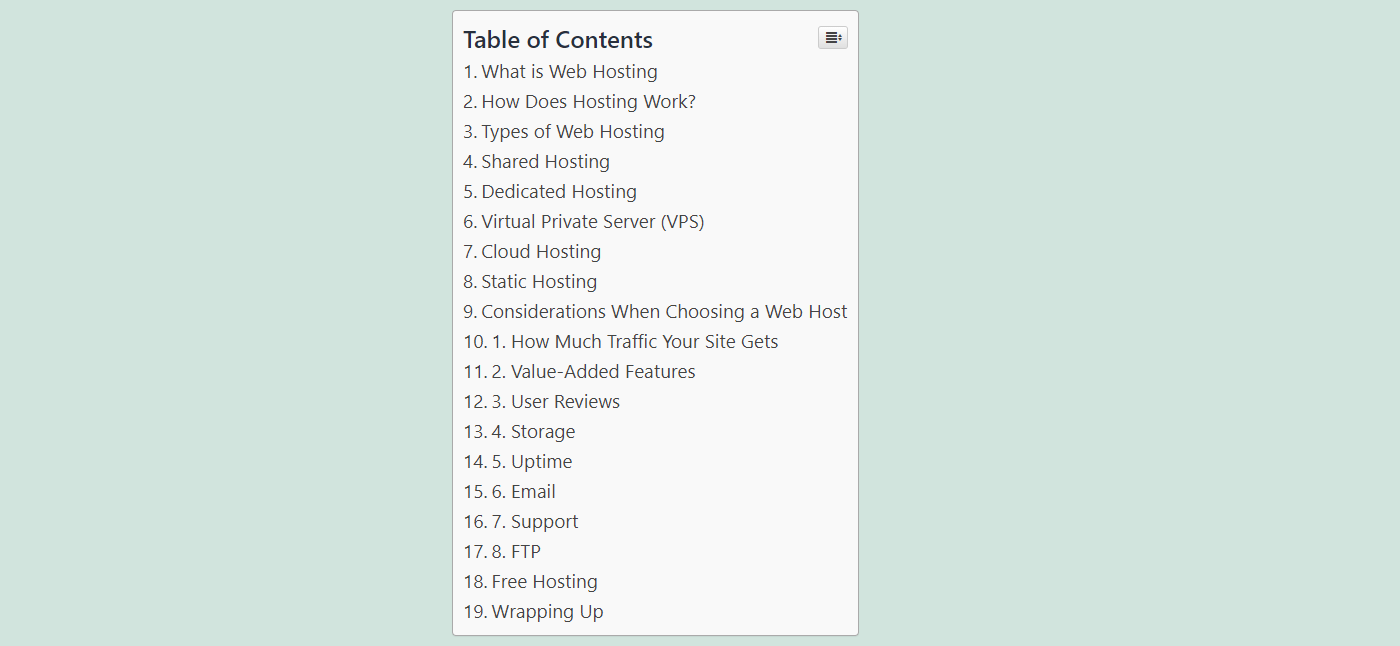
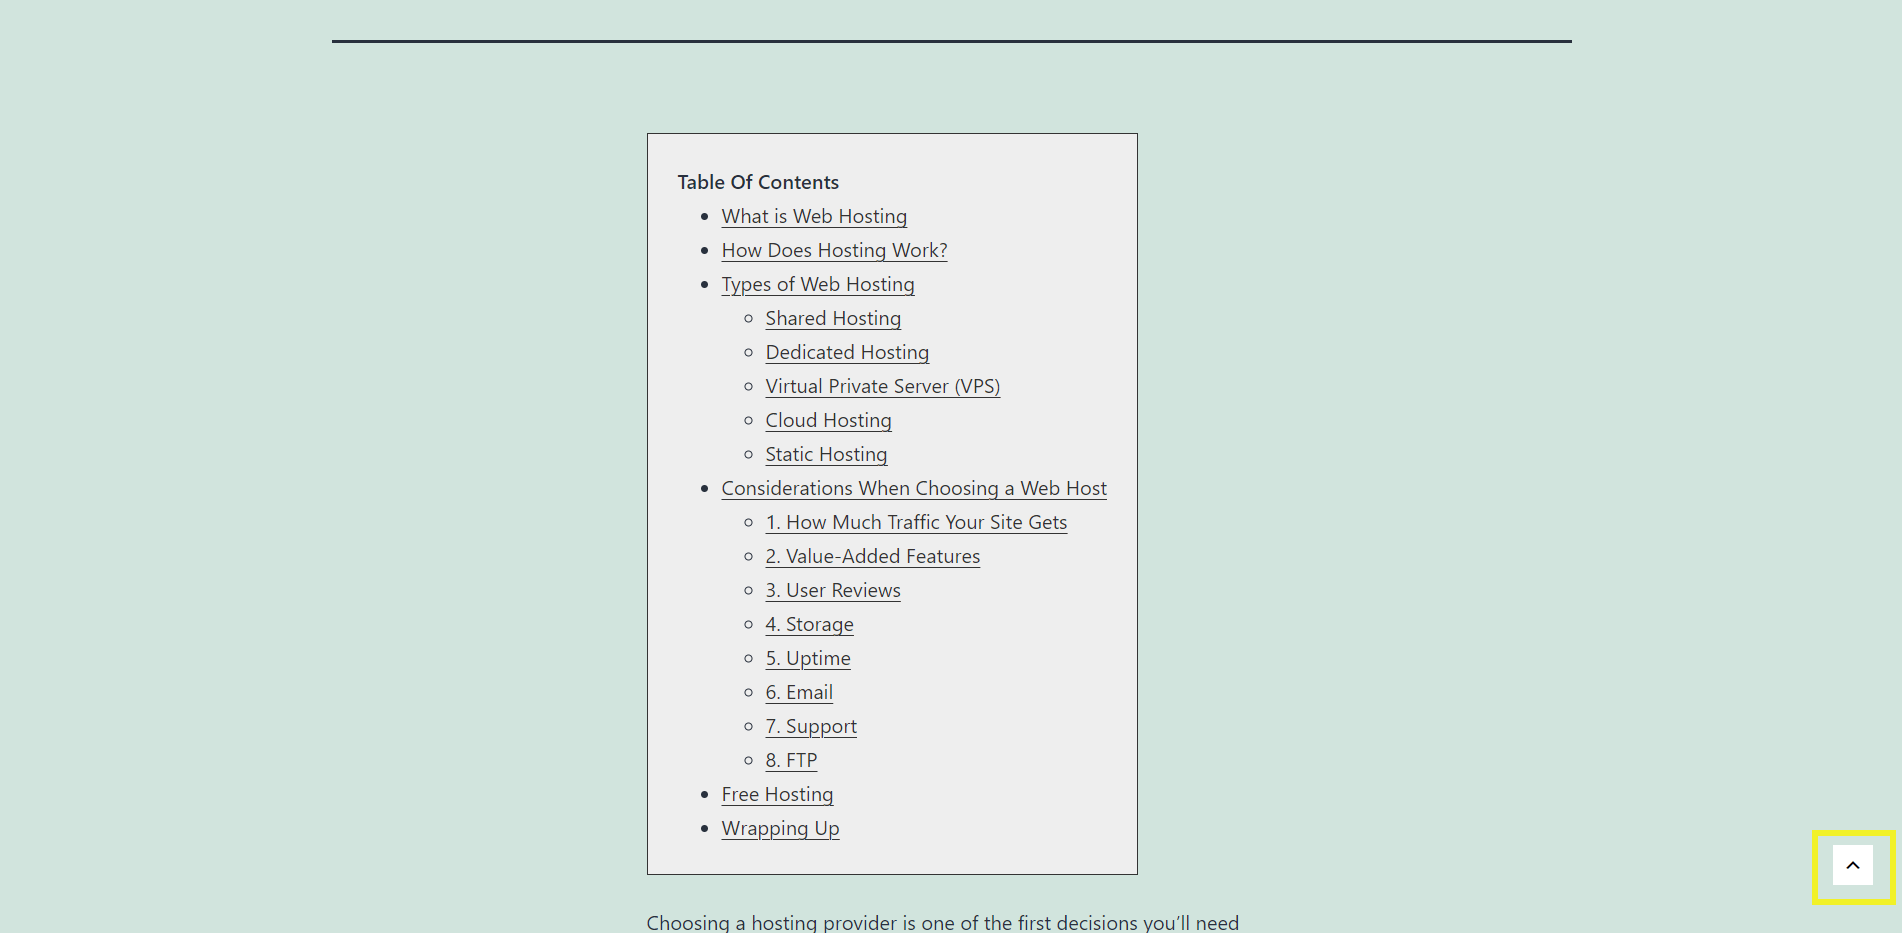
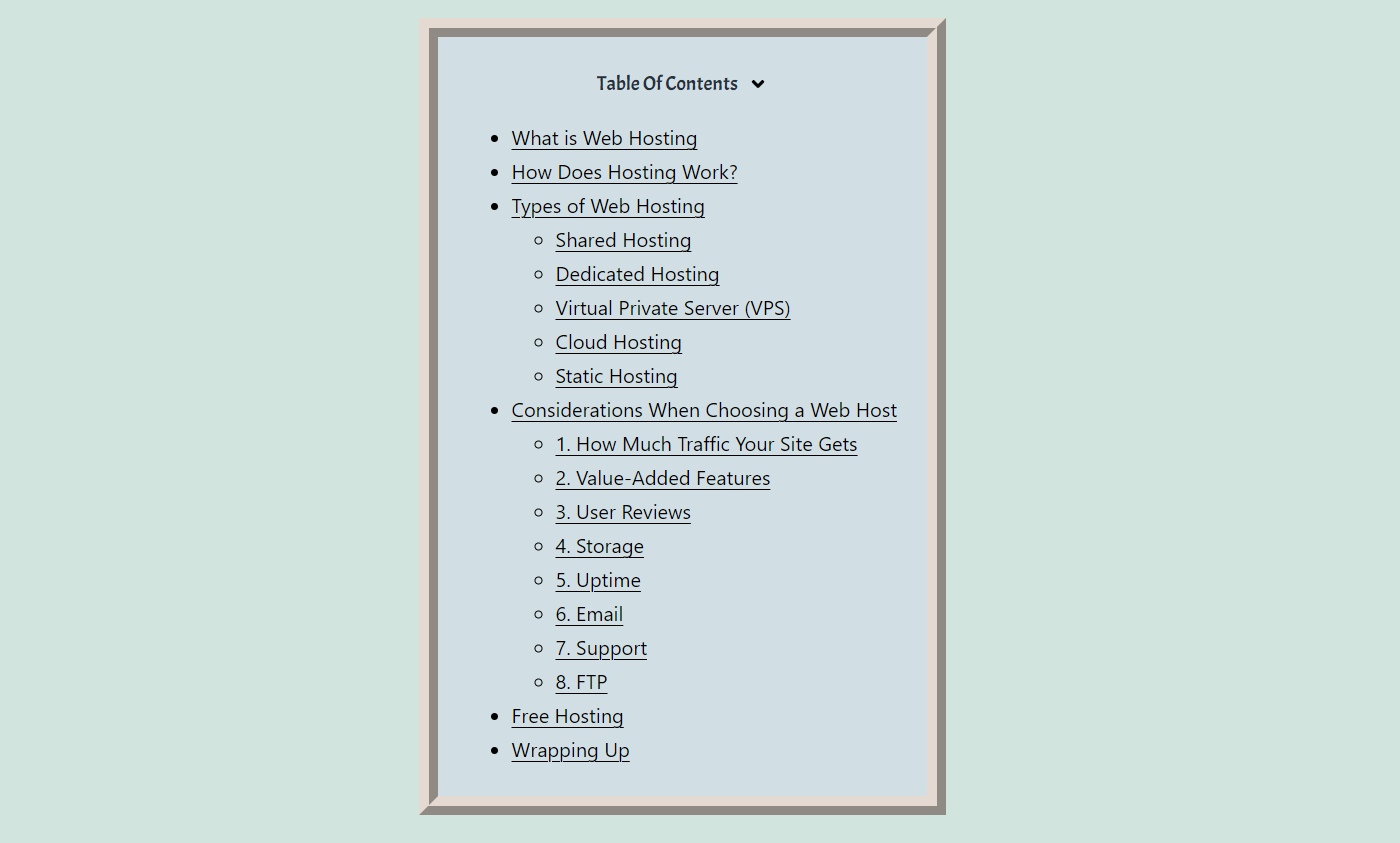
The last of the general settings enable you to tweak the table’s hierarchy and counters. If you check Show as Hierarchy, the table of contents will display subheadings as well as your main headings, like this:
Using the Counter drop-down menu, you can choose how each heading will be numbered. You can select from decimals, numerals, Roman numerals, or nothing:
Configure the plugin’s design settings
Next, you may want to make changes to your table of contents’ appearance with the following group of settings. You can control the width, as well as whether the table appears on the left, right, or center of the screen. If you’d like to alter the size of the font, you can do that here as well:
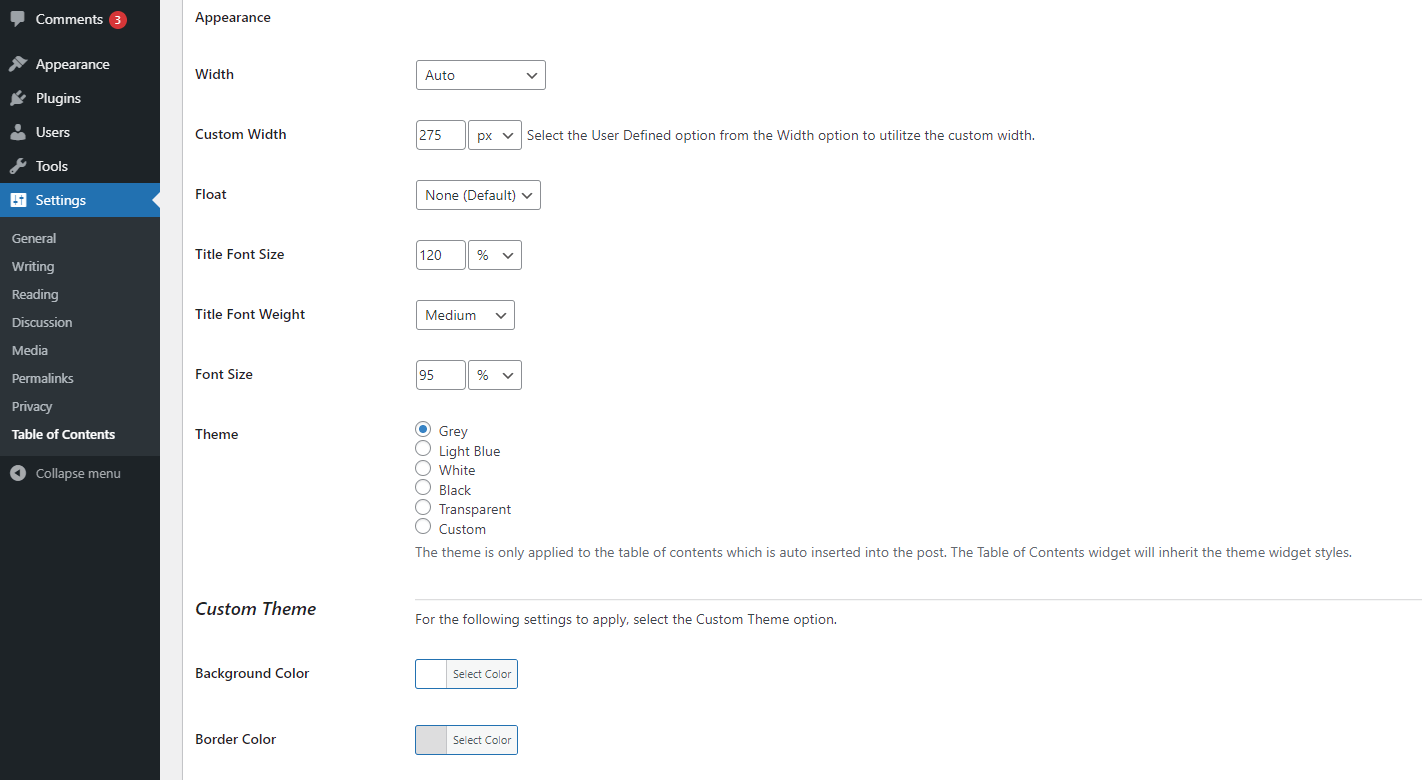
You can also choose from one of the plugin’s preset color themes. If none of them work well with your website, you can select Custom and define your own colors:

After changing any settings, be sure to click on the Save Changes button at the bottom of the page. Your table of contents should automatically appear according to your configuration settings.
2. Create your table of contents using blocks
You can also use the default WordPress Block Editor to add a table of contents to WordPress. First, you’ll need to download and activate the free Ultimate Addons for Gutenberg plugin:
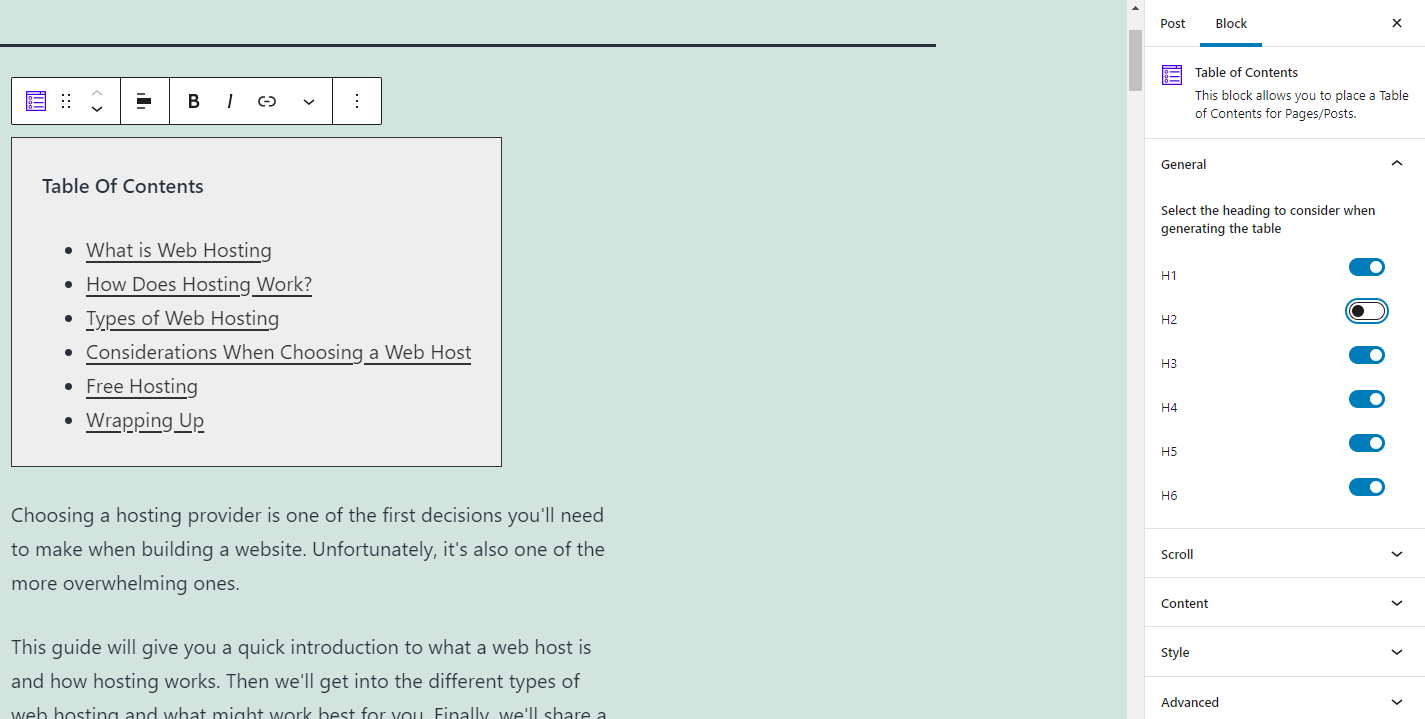
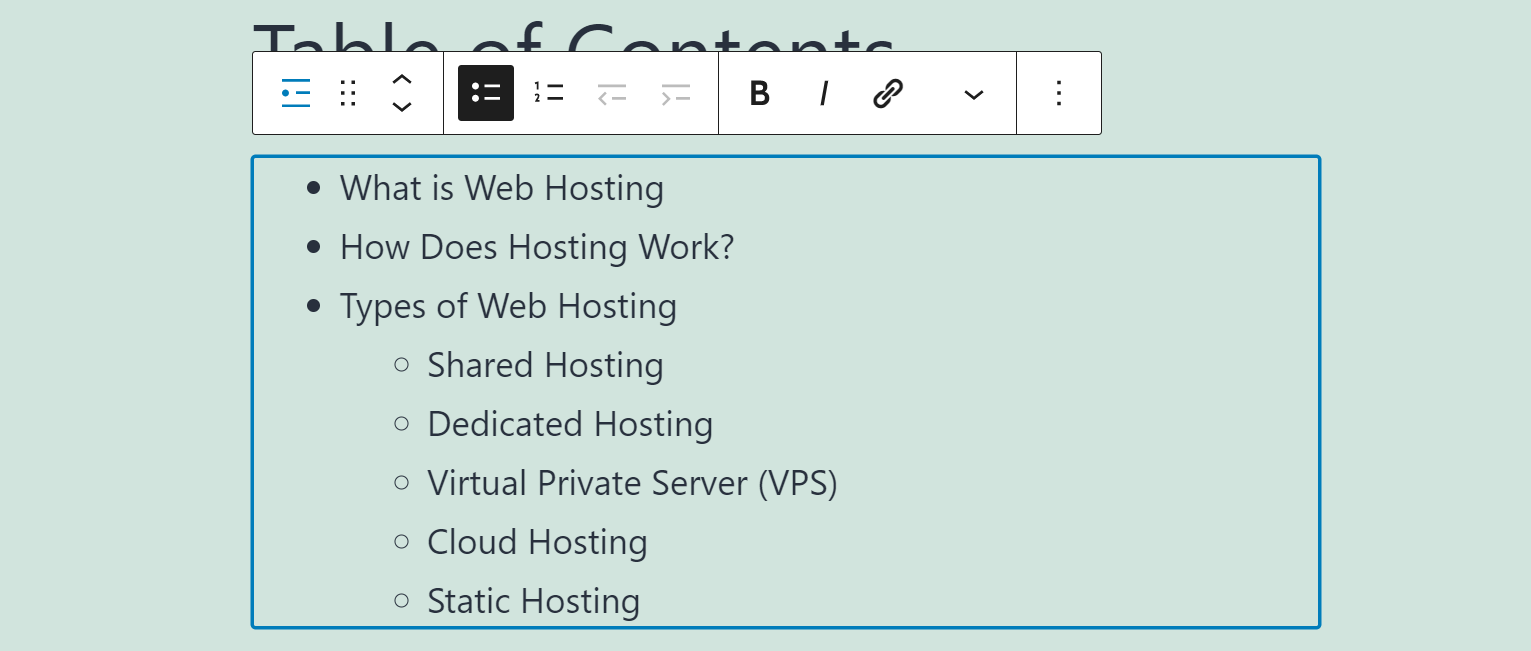
To add a table of contents to your page or post while working in the Block Editor, click on the plus sign and search for Table of Contents. This block will automatically generate a table based on your post’s headings, but there are also plenty of settings you can experiment with.
Under the General options, you’re able to select which heading levels will be included in the table. You may want to remove lower levels to keep your table of contents looking neat:
The Scroll settings enable you to turn on Smooth Scroll. When you select this option, readers can click on an entry in the table and ‘smoothly’ scroll to that section instead of jumping straight there.
You can also add a Scroll to Top button that will appear as readers move down the page. When you enable this setting, you’ll be able to select the colors for the button:
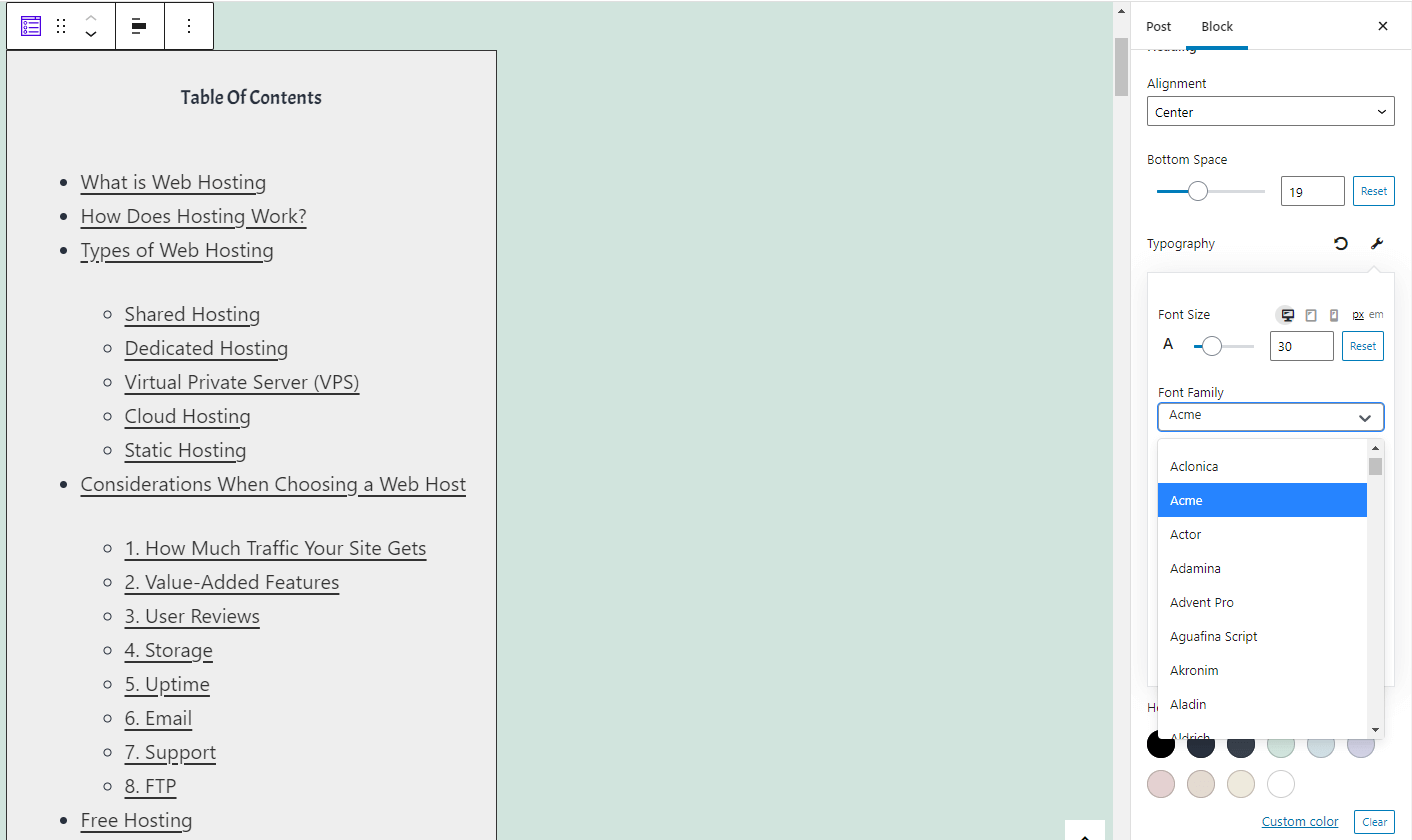
Next, let’s have a look at the Content settings. The first group of options is related to the table’s heading. You can adjust the text alignment, color, and even font:
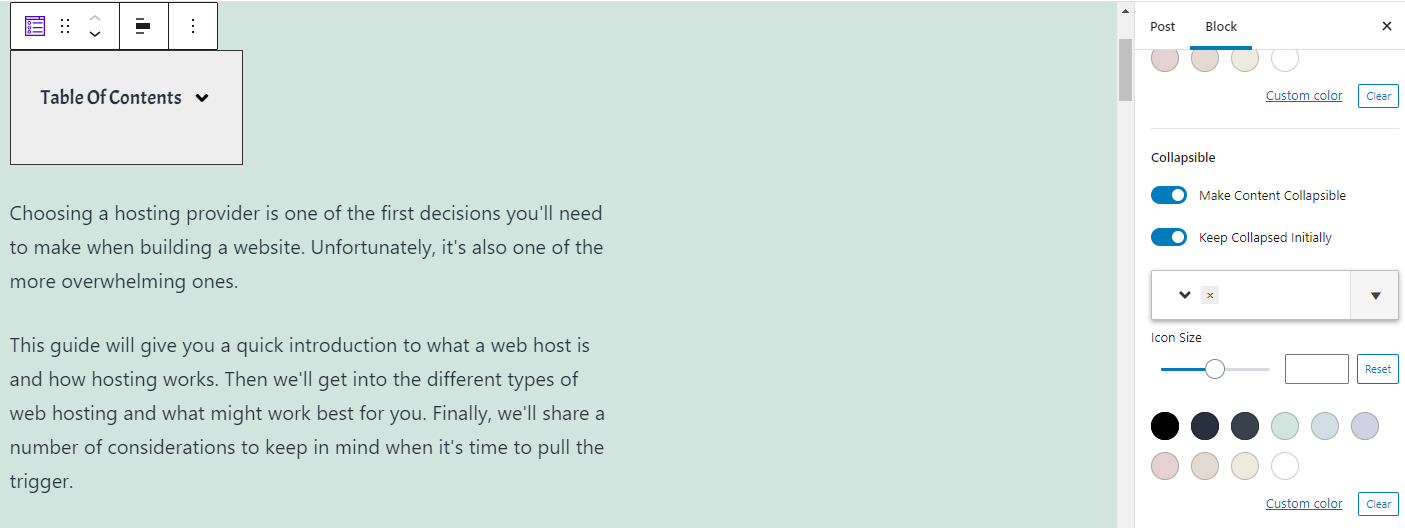
As with the Easy Table of Contents plugin, you can choose to make your table collapsible. If you’d like, the table can be collapsed initially, so users need to click on it to view it. In addition, you can select and customize the icon that’s displayed:
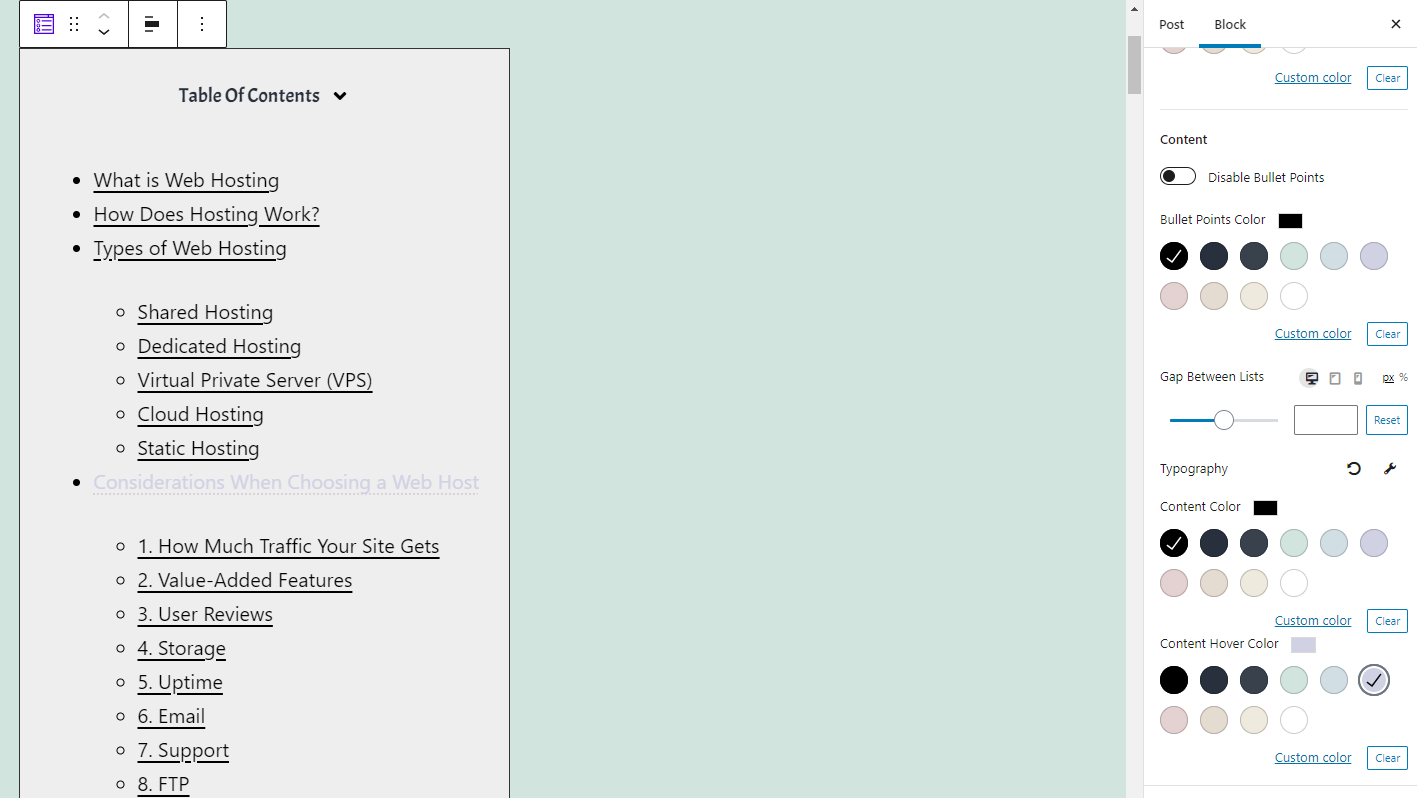
The last of the Content settings enables you to make changes to how the block displays the list of contents. You’re able to change the color of the bullet points or disable them entirely. You can also choose colors for the contents, including the hover color:
Finally, there are some Style settings. Here, you can select a background color for your table of contents. You can also adjust the width of the table, and even add a fancy border:
One advantage of using a block to add your table of contents is that you can style each table differently if you’d like.
3. Build a table of contents manually
The last method we’ll look at is building a table of contents manually using the Block Editor’s built-in functionality. This method offers less potential for customization, but is useful if you want to avoid adding another plugin to your site.
Since the editor doesn’t include a table of contents block by default, you can make your own using a simple list element:
For the section’s title, you can use a Heading block or just text (we recommend the former, as it’s better for SEO). Once you list every element within the post you’re working on, all that’s left to do is to add links to those sections.
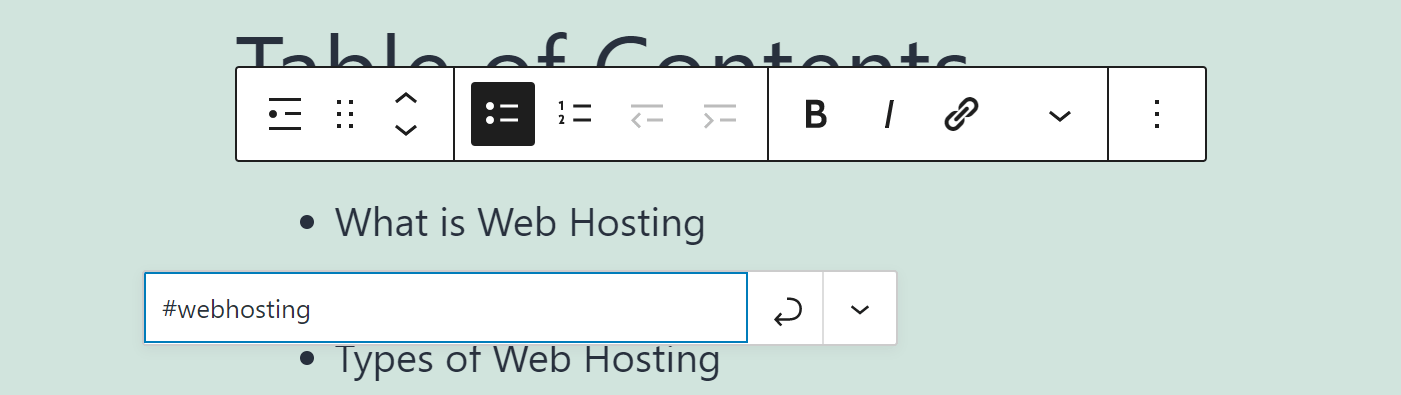
The simplest way to do this is to navigate to the subheading for each section within the list, and open the Advanced tab within that block’s settings. You’ll see a field called HTML anchor, where you can enter a unique identifier for that block:
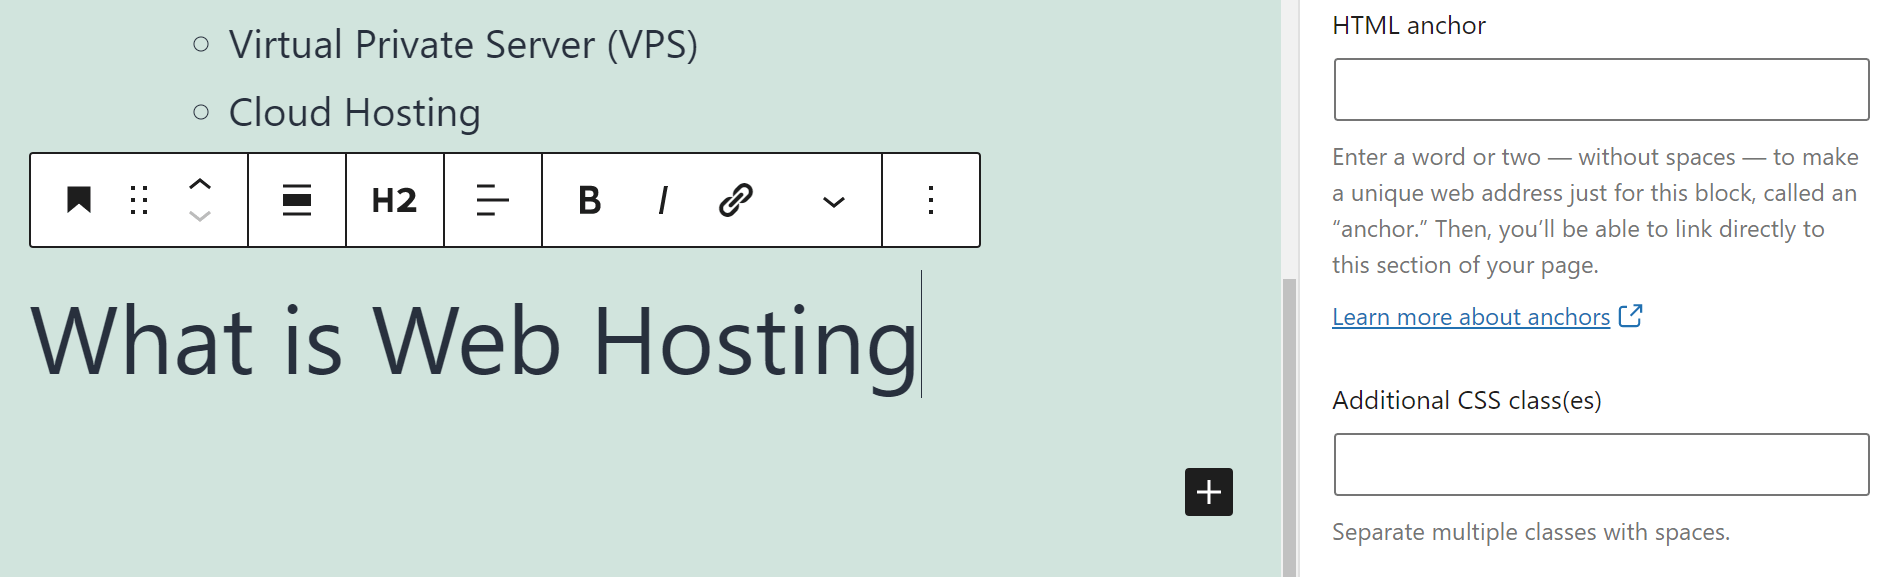
The anchor itself should be a single word, and it needs to be unique. Also, keep in mind that you can’t re-use the same identifier for multiple elements. For a section called “What Is Web Hosting?”, you could create an anchor labeled “webhosting”.
Then return to your table of contents, and select the entry within the list that corresponds to the section you want to link to. Add a link that includes the HTML anchor you just set preceded by a # sign, for example “#webhosting”:
Now when someone clicks on that link within your table of contents, their browser will automatically jump to the corresponding section. Just make sure you don’t set the link to open in a new page.
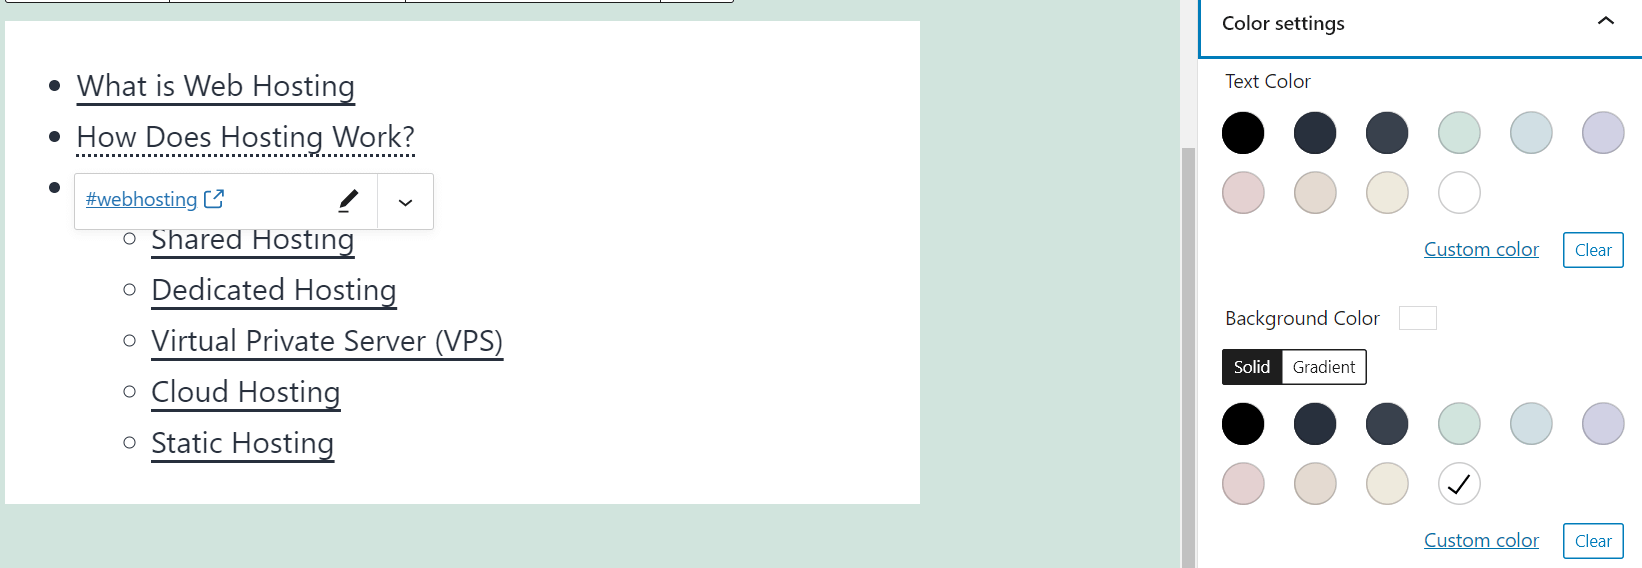
Repeat this process for every element within your table of contents, and you’ll be good to go. If you want the table itself to stand out visually, you can access the block’s settings and change its background color:
Once you find a style you’re comfortable with, save the changes to your post, and that’s it!
Conclusion
Adding a table of contents to WordPress posts can have benefits for the user experience, as well as your SEO efforts.
With multiple methods to choose from, you should be able to accomplish this task with very little trouble.
Using a plugin like Easy Table of Contents is probably the fastest way to get a table of contents on your pages, but you’ll have a bit more control if you use the Block Editor and the Ultimate Addons for Gutenberg plugin. Or, if you prefer not to use plugins, you can also create a table of contents manually using just the Block Editor.
A table of contents is one great way to prepare longer content and make it more accessible. For some other ideas, check out our suggestions for four ways to format long-form content.
Do you have any questions about adding a table of contents to WordPress? Ask away in the comments section below!