
Have you ever landed on a Google result that includes star ratings, video thumbnails, or a detailed product description? These bits of additional information are called rich results (formerly known as rich snippets), and the site code used to tell the search engine to find that information is called schema markup. Search engines already automatically scan for relevant schema types on your posts and pages, but when you add schema to WordPress (specifically telling Google the schema type), you increase the chance that your site gets those eye-catching rich results!
While there’s no direct ranking boost from schema markup, rich results help make your site more enticing in the organic search results, which could indirectly boost SEO.
In this post, we’ll explain more about how schema markup works. Then, we’ll show you how to add schema to WordPress using a simple plugin.
What do schema markup and rich results look like?
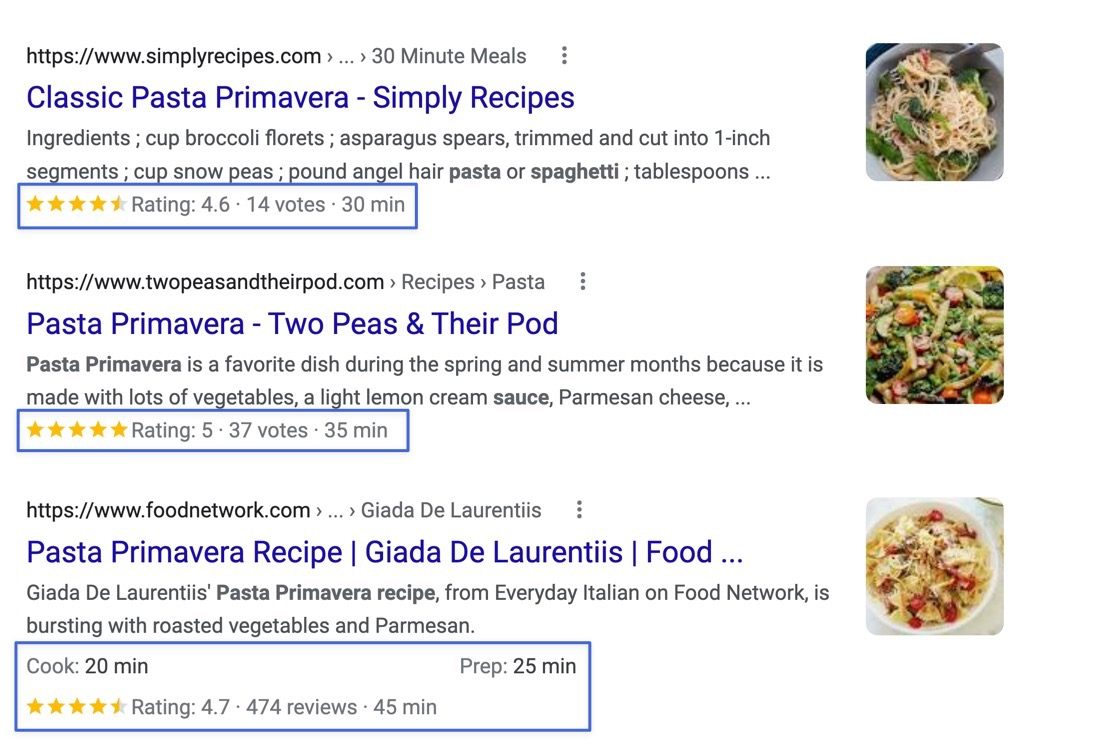
Schema markup is behind-the-scenes code on your WordPress site. Humans won’t ever see it, but search engines like Google use it to better understand your content and add visual elements called rich results, which look like this:


Stars aren’t the only rich results you’ll see, either. For instance, you might see a recipe search result with the number of reviews, time to cook/prep the dish, and even the number of calories in the meal.

Depending on what type of content you have, search engines pull different schema markup. Schema types include:
View the entire list of schema types on Schema.org. You’ll notice that each schema type has its own rich result elements, like “cook time” for recipes or “opening hours” for local businesses.


So how can you automatically add schema to WordPress for your content? Just follow this guide:
How to add schema to WordPress
Schema markup already exists on your WordPress site, and search engines like Google already do a pretty good job of figuring out the schema types on your posts and pages (like automatically identifying that a post is a recipe or tech review). However, Google isn’t perfect, so it sometimes needs some extra schema indicators to specify what type of content actually exists on your posts and pages.
Use the following steps to add schema to WordPress.
Step 1: Install a plugin to add schema to WordPress
Several developers have plugins to help you add schema to WordPress. Some allow for individual rich result creation, while others automate the process of specifying schema markup for the search engines to recognize. We like the plugins that have a little of both, and those are usually in the form of SEO plugins like Rank Math and Yoast SEO.
Rank Math gives you more control over schema in WordPress, and most of its schema features are free, so we recommend that one.
To start, install and activate the Rank Math plugin on your WordPress site. Learn how to install WordPress plugins if you need help.
Step 2: Assign default (global) schema markup for your pages and posts
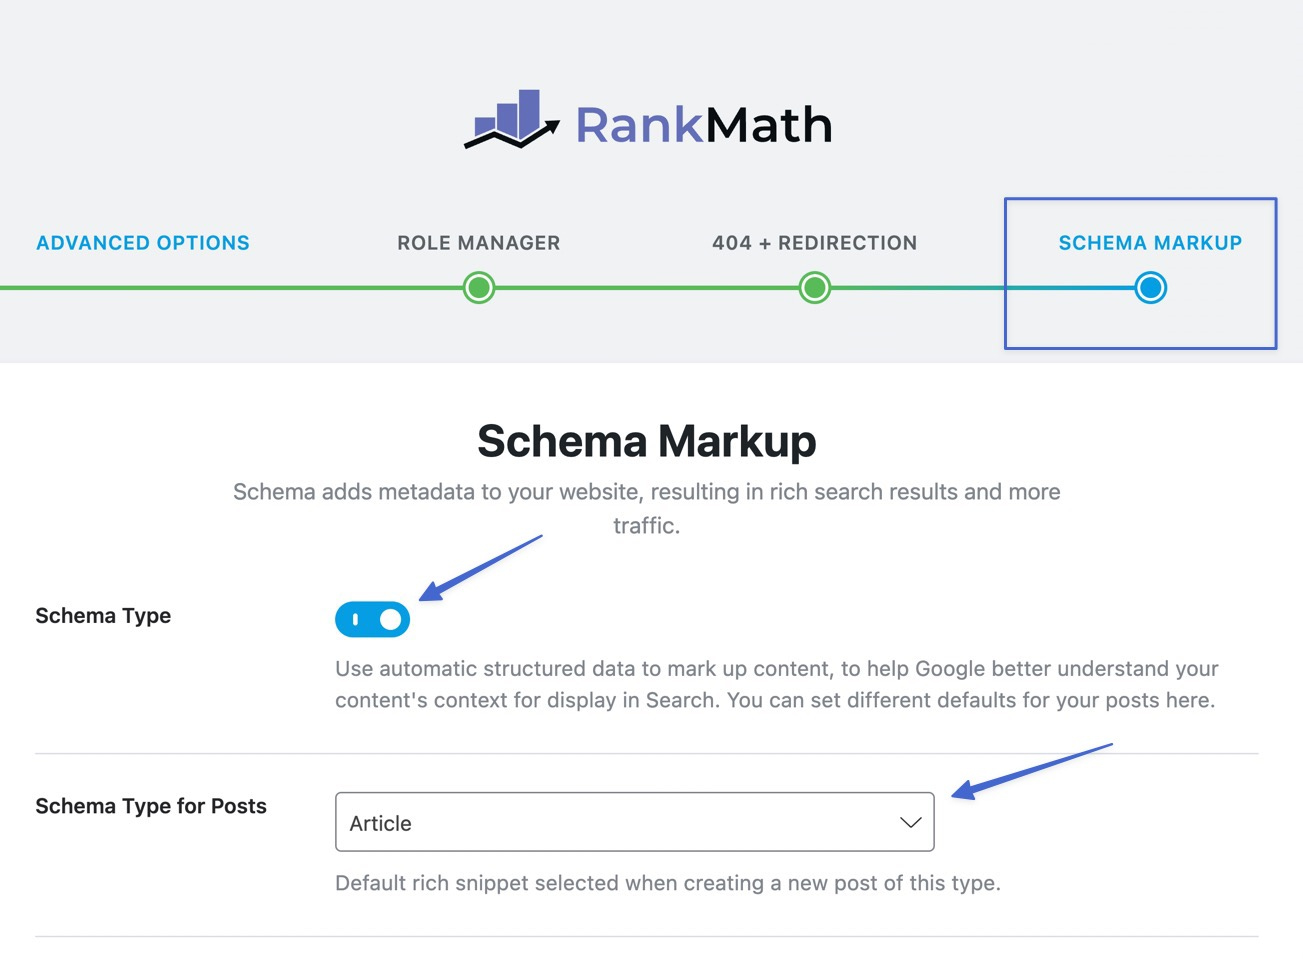
Rank Match provides a step-by-step start up guide; walk through each of these steps to configure basic SEO settings. Continue onto the Advanced Options section of the guide to find the Schema Markup module.
- Turn on the Schema Type switch to structure and send schema markup to Google automatically.
- Choose a Schema Type for Posts to specify a default rich result type whenever you make a WordPress post.
- Pick a Schema Type for Pages to specify a default rich result type whenever you create a WordPress page.

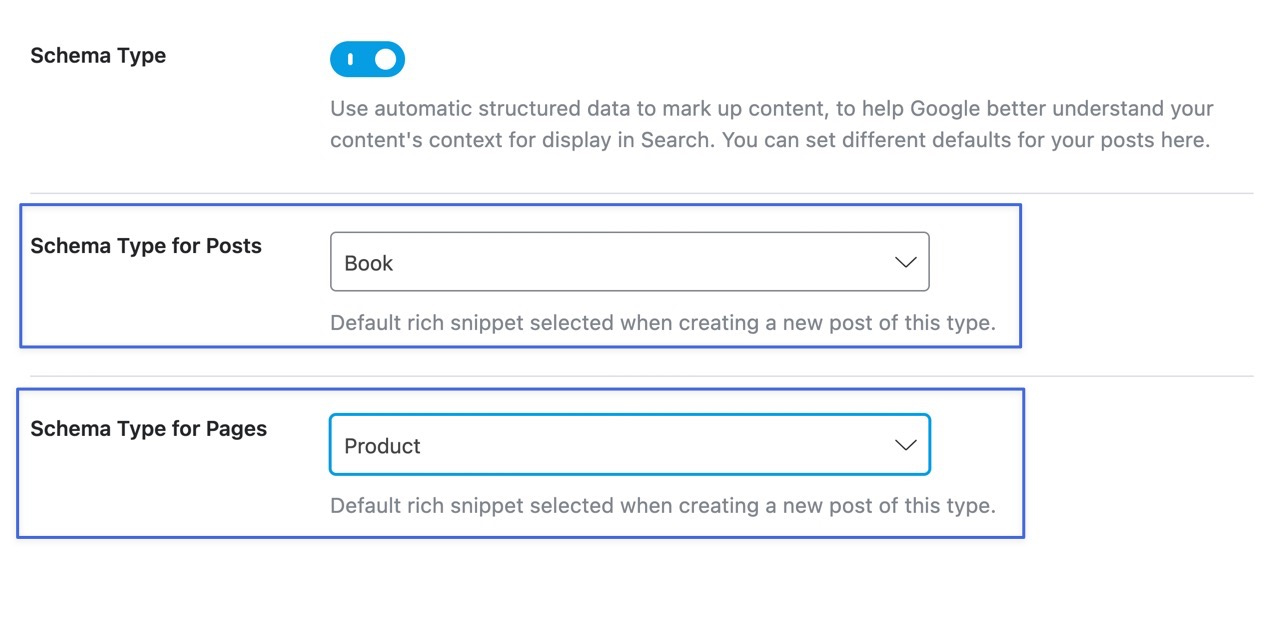
The dropdown menu provides various default rich result types for both posts and pages, including:
- Article
- Event
- Course
- Recipe
- Restaurant
- Service
- Person
- Restaurant
- Software application
- Many more

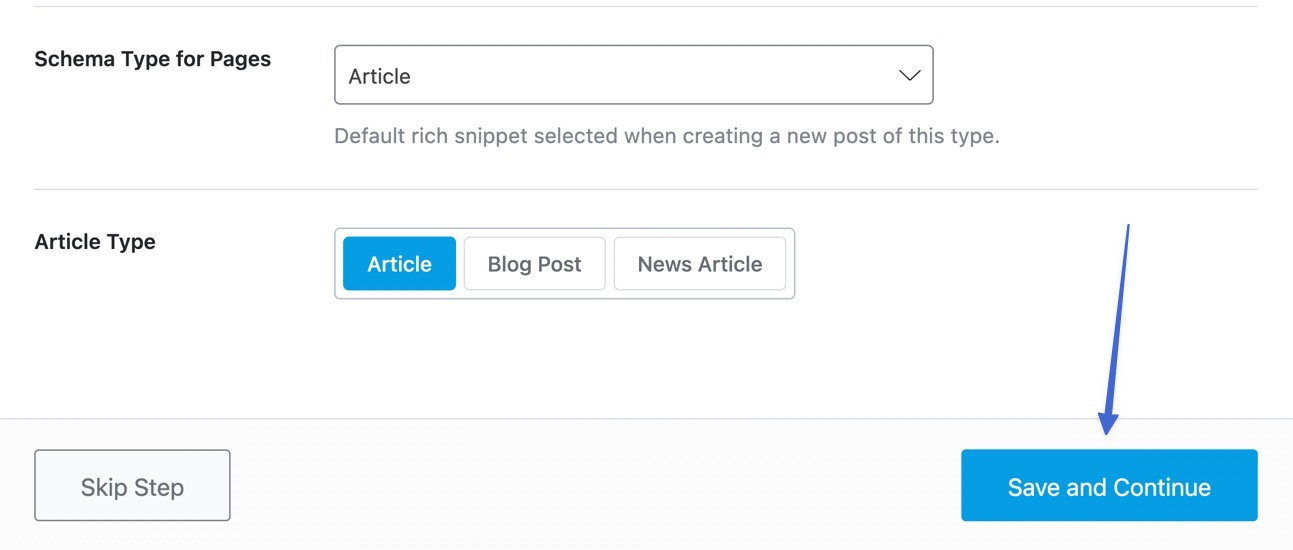
Some schema types ask for more information. For instance, the Article schema type wants to know if it is:
- A standard article
- A blog post
- A news article
That’s because each of these article types deliver unique rich results to the search engines.


Click the Save and Continue button when you’re done.

An alternative way to change your global schema types
It’s always possible to change those initial schema markup selections by going to Rank Math > Titles & Meta in WordPress. You can locate the settings under Post Types, then by clicking Posts or Pages.

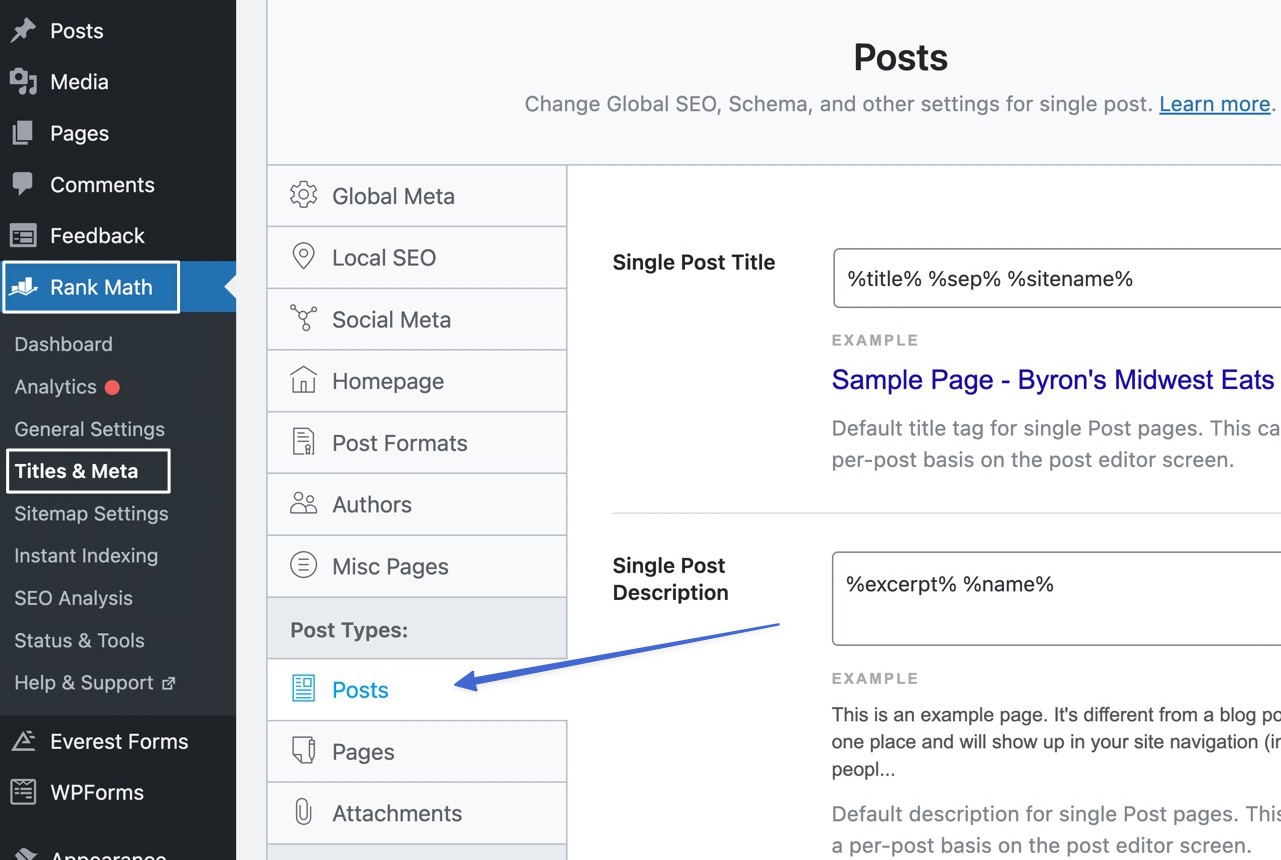
Just like in the start up guide, this lets you change the default schema type across your entire WordPress site for posts and pages. It even offers options to customize the headline and description for search results.

And the Pages tab offers the same thing, but for WordPress pages instead of posts.


Step 3: Add unique schema markup to individual posts and pages
Besides your global settings, you have the option to override the default schema markup, and even build rich results, in every WordPress post and page. To do this, open or create a new page or post.
In the editor, click the Rank Math button on the top right; the button shows an SEO score for the page or post. You can see the current SEO preview when the Rank Math module appears.
![]()
![]()
Click on the Schema tab. Choose the Edit button next to the current (global) schema type.

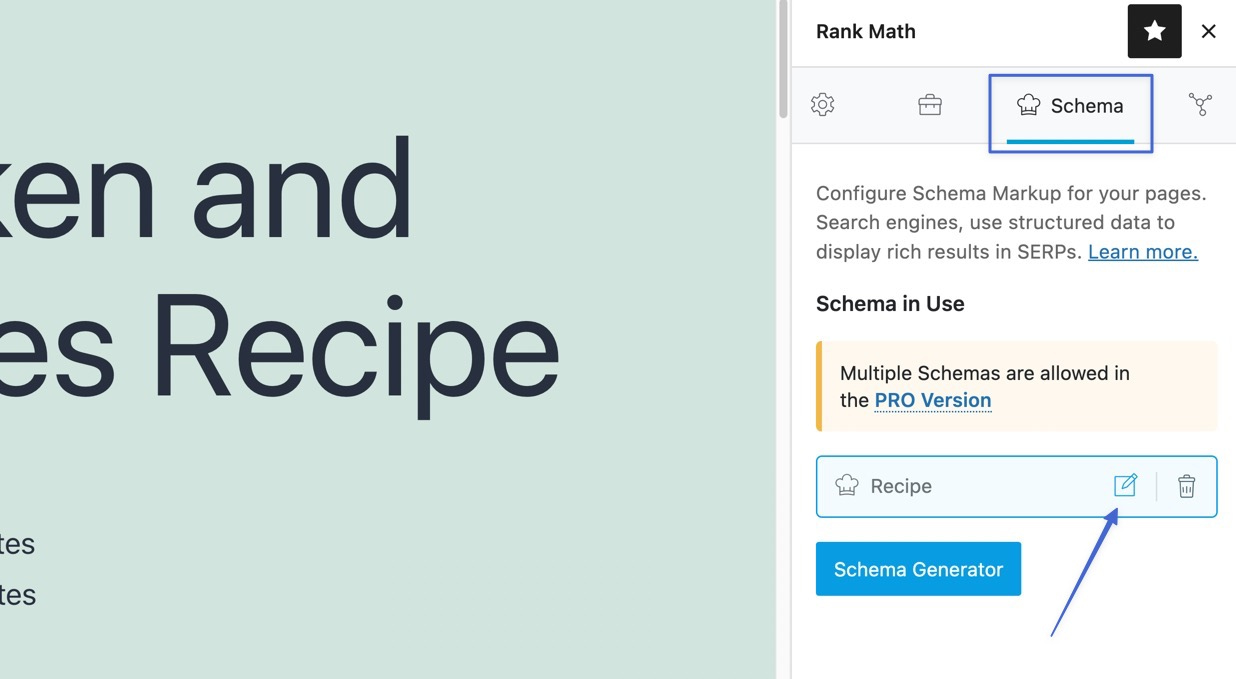
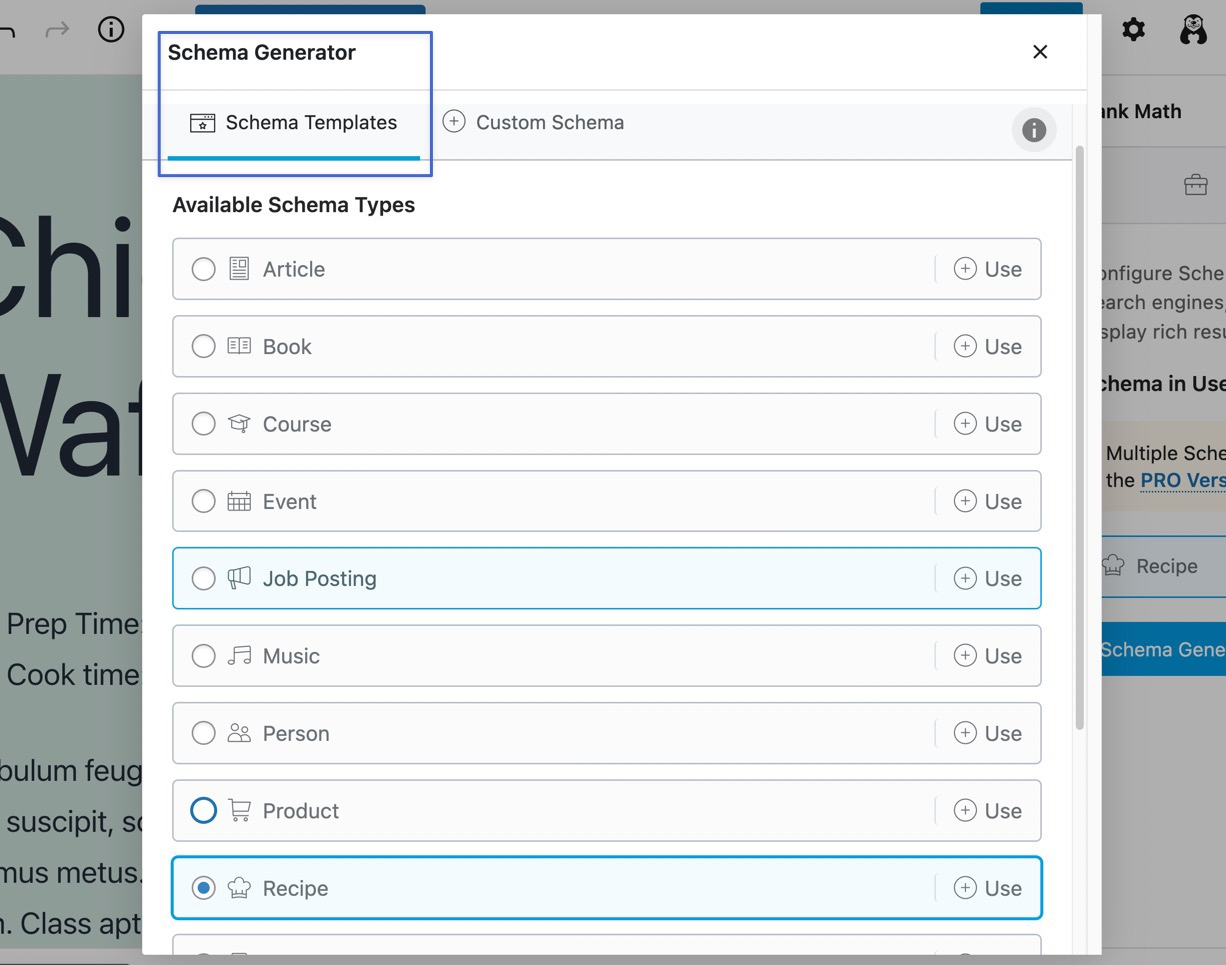
You also have the option to click the Schema Generator button, which lets you pick a new schema type from scratch.

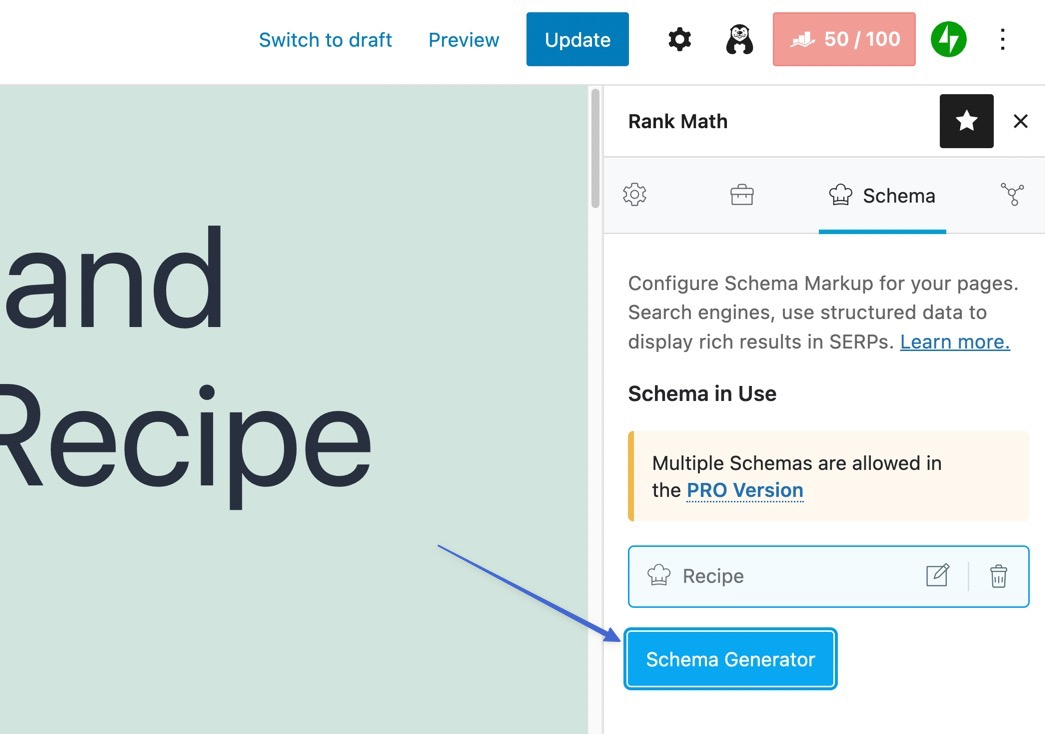
The Schema Generator lists all schema types like Articles, Books, Events, Job Postings, and Recipes. You can pick to Use one and replace the global schema.

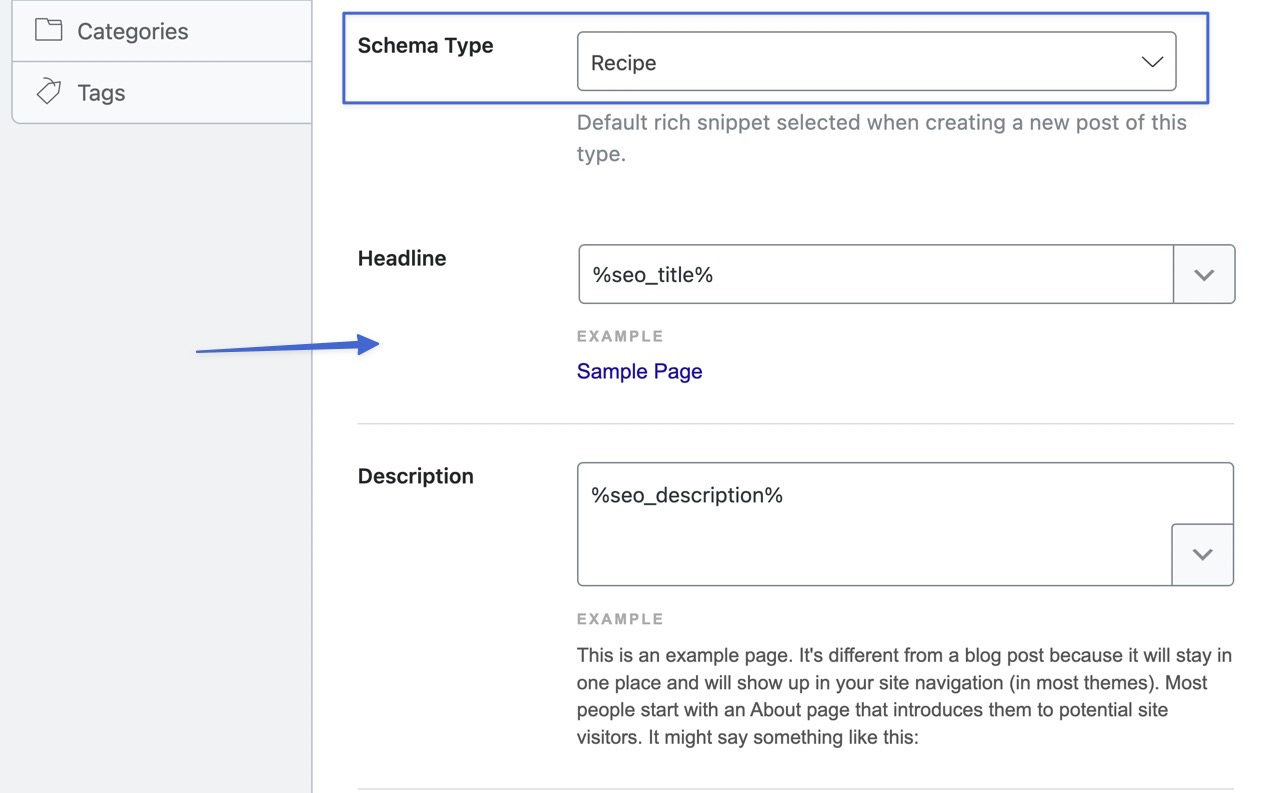
This reveals the Schema Builder window, where you can type in specific schema elements for what’s available in the schema type.

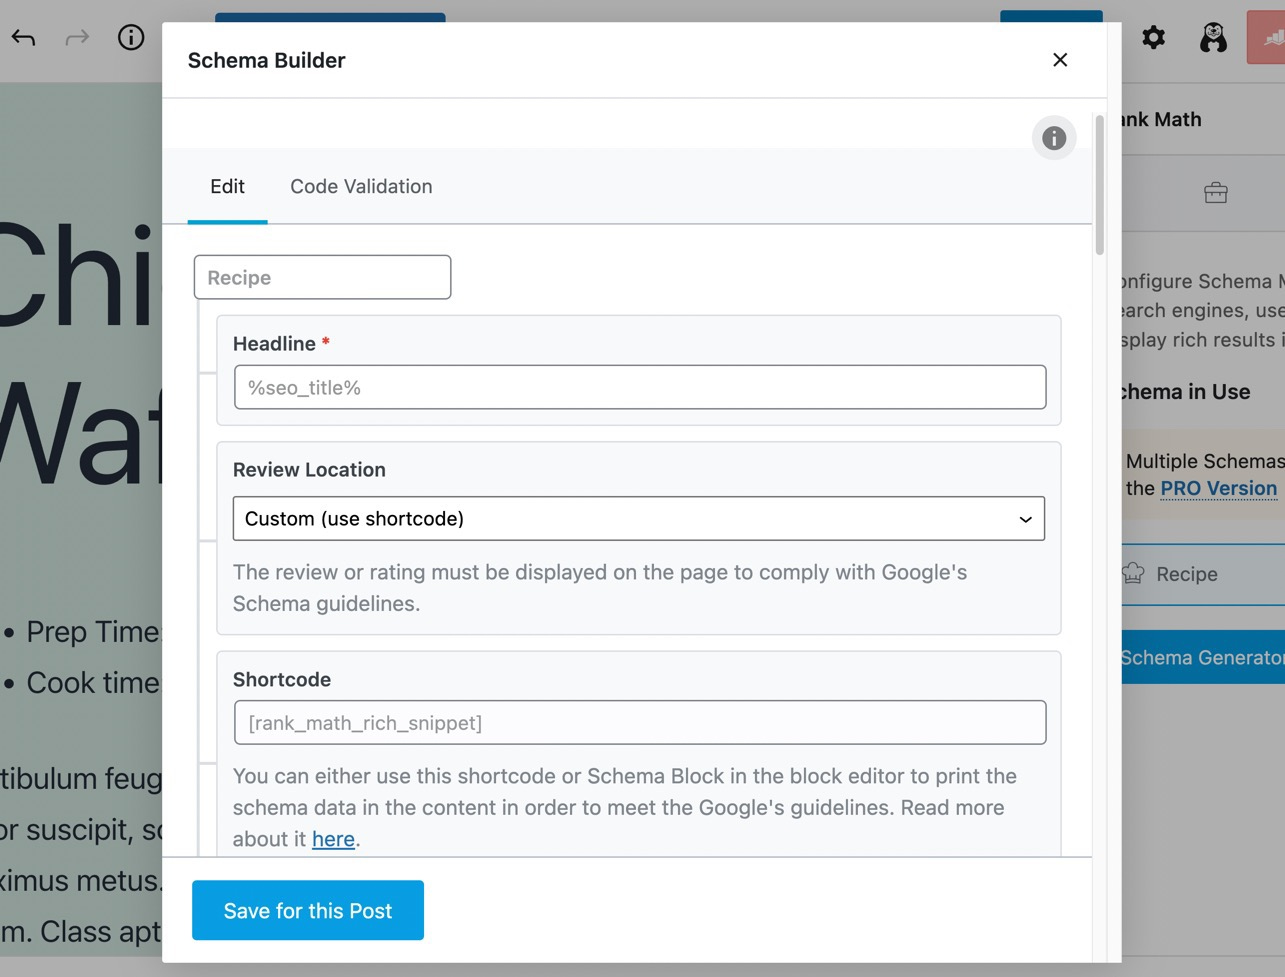
For instance, the Recipe schema type offers fields for:
- Preparation Time
- Cooking Time
- Total Time
- Type
- Calories
- Cuisine
- Much more
Fill in the information you’d like to appear on search engines for this post/page. Keep in mind that some fields require unique formats, like how recipe cooking and prep times use the ISO 8601 format (example: PT1H30M).
Click Save For This Post when you’re done.


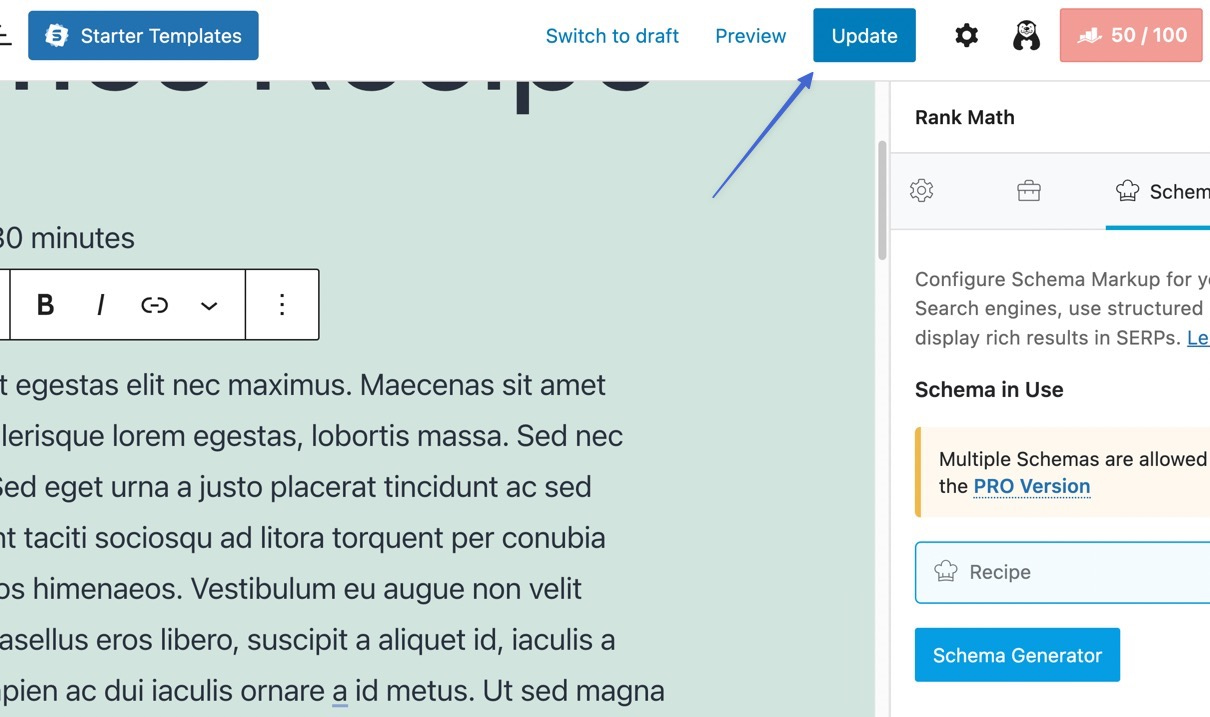
To save the changes, and prompt Google to index the page or post, click Update or Publish.

Step 4: Preview your rich results
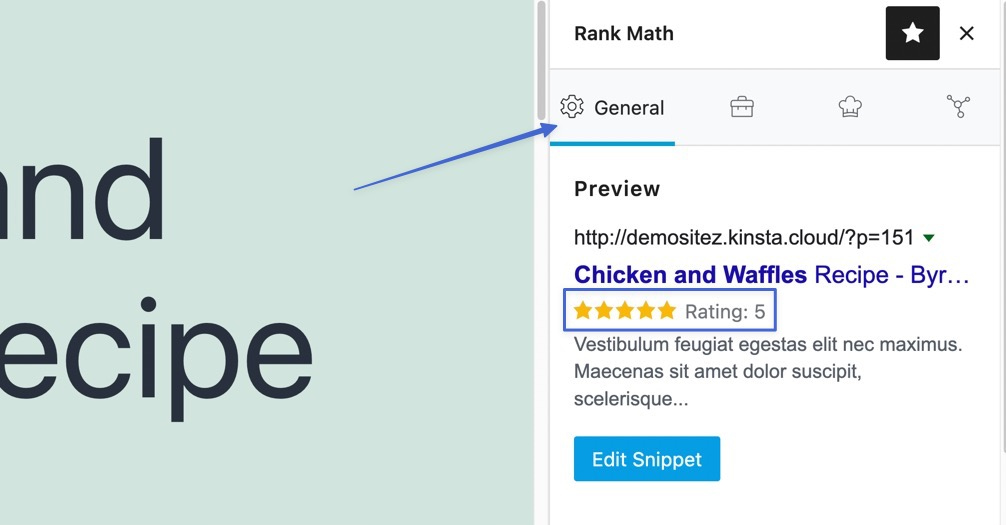
Google usually takes some time to crawl your new posts and identify all relevant schema elements. But you should monitor your search results to see which rich results appear.
You could always just search for the post or page on Google, but Rank Math also eventually renders some of the rich snippets in its Preview (under General).

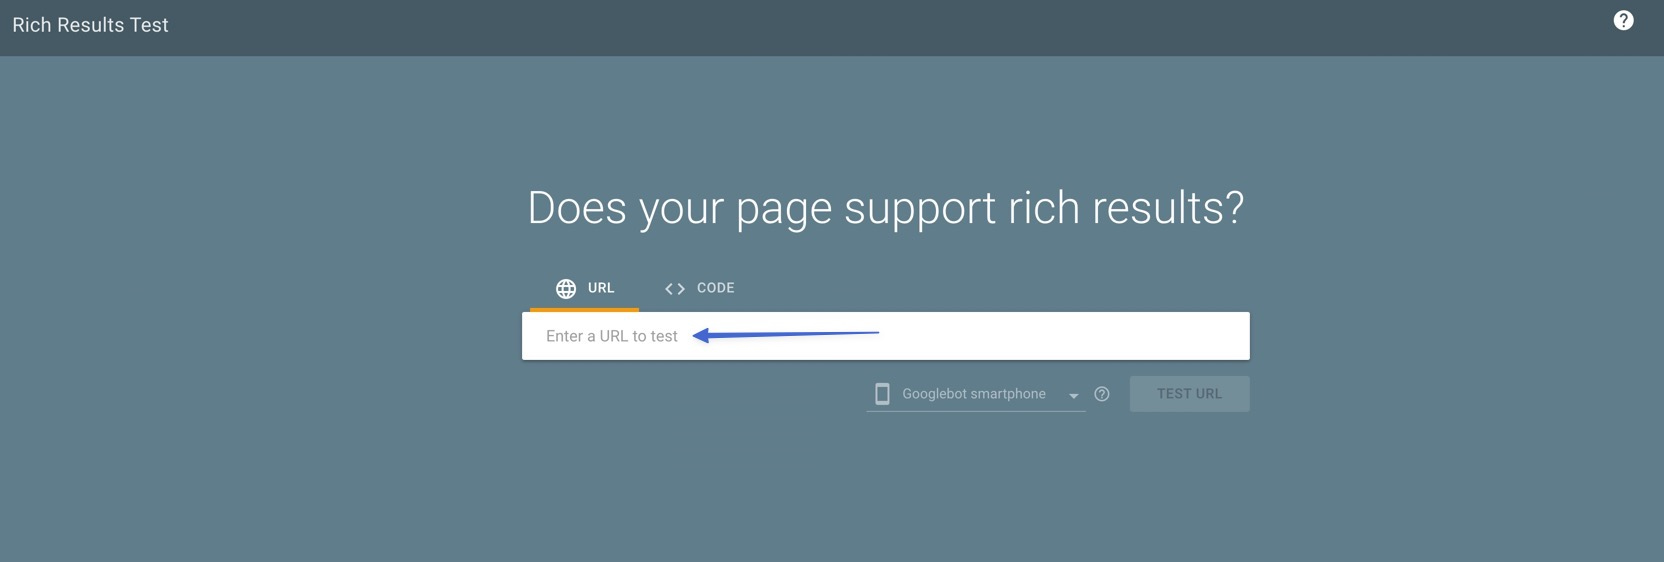
Another option is to paste the URL into Google’s Rich Results Test page. This provides previews of the rich results and explains any issues with your schema.

That’s how to add schema to WordPress!
While schema markup might not have a direct effect on your WordPress site’s SEO, it’s still a great way to make your content more visible in the organic search results, so it’s worth taking the time to add it to your site.
Do you have any other questions about how to add schema to WordPress? Leave a comment and we’ll try to help out!